

To frame a basement wall, start by fastening the bottom plate and using a straight stud and level to find the location for the top plate. Snap a line and attach the top plate, then mark the location of the first stud on both plates.
Framing a basement wall can be challenging for beginner DIYers, so it’s recommended that you call in a professional for the job. Proper framing is crucial, as it acts as the skeleton for your basement renovation. Before framing, it’s also important to install vapour barriers on foundation walls to prevent moisture from seeping into them and causing mould.
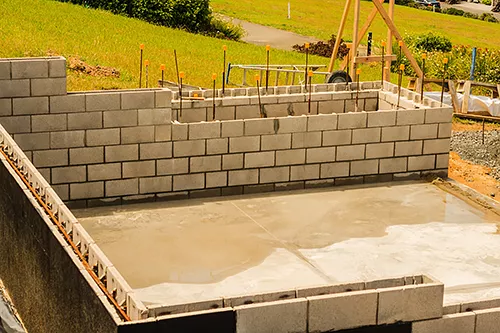
The spacing for framing a basement wall should be done according to guidelines provided by experts.

Credit: www.newhomesource.com
1. Introduction To Framing A Basement Wall
Learn how to frame a basement wall with this comprehensive guide. Discover the step-by-step process for framing your basement walls, ensuring a solid foundation for your renovation project. This tutorial covers everything you need to know, from measuring and cutting to installing studs and plates.
When finishing or renovating a basement, framing the walls is an essential step that provides structure, support, and insulation. Framing a basement wall involves constructing a wooden frame around the perimeter, creating a solid foundation for drywall and other finishes. This article will guide you through framing a basement wall, including why it’s necessary, the importance of proper framing, and the tools and materials you’ll need.
1.1 Why Frame A Basement Wall
Framing a basement wall serves multiple purposes:
- Structural Support: Framing creates a sturdy framework that supports the weight of the wall finishes, such as drywall or panelling.
- Insulation: The wall frame provides space for insulation material, helping to regulate temperature and reduce energy consumption.
- Moisture Control: A framed wall can be equipped with a vapour barrier to prevent moisture from seeping into the basement.
- Soundproofing: Properly insulated and framed walls can help minimize sound transmission from other parts of the house or outside.
1.2 Importance Of Proper Framing
Proper framing is crucial for several reasons:
- Structural Integrity: A well-constructed frame ensures stability, preventing the wall from shifting or sagging over time.
- Level and Plumb: Accurate framing ensures the wall is straight, level, and plumb, providing a professional and aesthetically pleasing result.
- Easy Installation: A properly framed wall makes installing drywall, electrical wiring, and plumbing easier.
- Longevity: Proper framing extends the lifespan of the wall, reducing the risk of damage and the need for future repairs.
1.3 Tools And Materials Needed
To frame a basement wall, you will need the following tools and materials:
| Tools | Materials |
|---|---|
|
|
In conclusion, framing a basement wall is crucial in finishing or renovating a basement. It provides structural support, insulation, and moisture control while ensuring the longevity and soundproofing of the space. Proper framing requires accurate measurements, the right tools, and the selection of quality materials. With the information and instructions in this guide, you’ll be ready to tackle framing a basement wall confidently.

Credit: northbuiltconstruction.com
2. Step-by-step Guide To Frame A Basement Wall
Framing a basement wall is an essential step in basement renovation projects. It provides structure, support, and insulation to the space, turning it into a usable and comfortable area. Framing a basement wall can be challenging whether you’re a beginner or an intermediate-level DIYer. However, you can accomplish this task successfully with the right tools, materials, and step-by-step guidance. This guide will walk you through each process step, from preparing the basement to installing blocking and foam board.
2.1 Preparing The Basement
Before you start framing the wall, properly preparing the basement is important. Clear out debris, remove obstructions, and ensure the basement floor and walls are clean and dry. Additionally, measure the dimensions of the wall you plan to frame, considering any obstacles or obstructions, such as pipes or existing structures.
2.2 Fastening The Bottom Plate
The first step in framing a basement wall is fastening the bottom plate. The bottom plate acts as the anchor for the wall, providing stability and support. Measure and cut the bottom plate according to the dimensions of the wall. Place the plate along the desired location, ensuring it is level and aligned with the basement walls. Use a hammer drill and masonry screws to secure the bottom plate to the concrete floor, ensuring a tight and secure fit.
2.3 Plumb And Install Top Plate
Once the bottom plate is securely fastened, it’s time to install the top plate. Measure and cut the top plate according to the length of the wall. Use a straight stud and a level to plumb up from the bottom plate and find the location for the top plate. Snap a line to mark the position of the top plate. Fasten the top plate to the ceiling joists using nails or screws, ensuring it is level and aligned with the bottom plate.
2.4 Marking And Installing Studs
After installing the top and bottom plates, it’s time to mark and install the studs. A tape measure determines the spacing between the studs, typically 16 inches in the centre. Mark the location of the studs on both the top and bottom plates, ensuring they align with each other. Install the studs by nailing or screwing them into the plates, ensuring they are upright and straight.
2.5 Framing The Wall
With the studs in place, it’s time to frame the wall. Start by installing horizontal blocking between the studs to provide additional structural support. Use nails or screws to secure the blocking in place. Once the blocking is in place, cut and install vertical blocking at the corners and other necessary locations. This adds strength and stability to the wall.
2.6 Dealing With Obstacles
You may encounter obstacles such as pipes, electrical wires, or HVAC vents during the framing process. Take proper measurements and mark the location of these obstacles on the plates. Use a reciprocating saw or other appropriate tool to cut openings in the studs, allowing the obstacle to pass through the wall. Ensure the openings are properly framed and secure.
2.7 Installing Blocking And Foam Board
To further enhance the insulation and soundproofing of your basement wall, consider installing blocking and foam board. Blocking can be installed horizontally between the studs, filling gaps or openings. Foam board insulation can be attached to the studs, adding an extra insulation layer to the wall. Cut the foam board to size and secure it in place using adhesive or fasteners.
Following this step-by-step guide, you can successfully frame a basement wall and create a solid foundation for your basement renovation project. Remember to take accurate measurements, use proper tools and materials, and ensure everything is plumb and level for a professional-looking finish.
3. Tips And Considerations For Framing A Basement Wall
When framing a basement wall, remember a few important tips and considerations. Whether you’re a beginner or have some experience with DIY projects, these tips will help ensure your basement wall is properly framed and structurally sound.
3.1 Vapor Barrier For Moisture Protection
One important consideration when framing a basement wall is moisture protection. Moisture can easily seep into basements, so installing a vapour barrier is crucial to prevent any potential damage caused by water. A vapour barrier is a material that acts as a barrier between the wall and any moisture that may be present.
To install a vapour barrier, follow these steps:
- Begin by cleaning the wall surface and ensuring it is dry.
- Roll out the vapour barrier material and cut it to the appropriate size.
- Secure the vapour barrier to the wall using adhesive or staples, ensuring it is tightly sealed.
- Overlap the seams of the vapour barrier to provide maximum protection against moisture.
- Finally, trim any excess vapour barrier material for a neat and clean finish.
3.2 Proper Spacing For Framing
Proper spacing between the studs is essential when framing a basement wall. This ensures the wall’s structural integrity and provides a solid base for attaching drywall or other finishing materials. The standard spacing for framing a basement wall is 16 inches in the centre.
Here are a few key points to remember when spacing your studs:
- Start by measuring and marking the layout for your studs on the bottom and top plates.
- Use a measuring tape and a square to ensure accurate and consistent measurements.
- Align the edge of the first stud with the layout mark on the bottom plate and secure it with nails or screws.
- Continue the process, spacing each stud at the desired distance apart.
- Double-check the spacing using a level and make any necessary adjustments.
3.3 Common Mistakes To Avoid
When framing a basement wall, it’s important to avoid common mistakes that compromise the structure’s integrity. Here are a few mistakes to watch out for:
- Avoid nailing or screwing the studs into any electrical wiring or plumbing.
- Avoid using warped or damaged studs.
- Ensure the bottom and top plates are level and securely fastened.
- Double-check the spacing between studs to ensure consistent and proper framing.
- Properly secure the vapour barrier to prevent any gaps or tears.
3.4 Getting Started As A Beginner
If you’re new to framing basement walls, having the right tools and equipment is essential before starting. Here are a few tools you’ll need:
| Tools | Materials |
|---|---|
| Measuring tape | Studs |
| Square | Bottom plate |
| Level | Top plate |
| Hammer or nail gun | Vapor barrier |
| Saw | Nails or screws |
| Stapler or adhesive | – |
Before starting your project, it’s also helpful to watch tutorials or seek guidance from professionals to ensure you understand the process clearly.
3.5 Dealing With Steel Braces
When framing a basement wall, you may encounter steel braces. These braces are typically used for reinforcing the structure and providing additional support. If you come across steel braces, keep the following tips in mind:
- Measure and mark the location of the steel braces.
- Secure the top and bottom plates on each brace side, ensuring they are level and plumb.
- Cut studs to fit around the braces, allowing for a snug and secure fit.
- Attach the studs to the plates, making sure they are securely fastened.
By following these tips and considerations, you can confidently frame a structurally sound basement wall that is ready for finishing touches.
Credit: www.thehousedesigners.com
Frequently Asked Questions On How To Frame A Basement Wall
Where Do You Start When Framing A Basement?
To start framing a basement, fasten the bottom plate first, then use a straight stud and level to find the location for the top plate. Snap a line and attach the top plate. Plumb up again and mark the location of the first stud on both plates.
Is It Hard To Frame A Basement Wall?
Framing a basement wall can be challenging for intermediate-level DIYers. It is recommended to call a professional if you are a beginner. Proper framing is crucial as it is the backbone of your basement renovation. Start by fastening the bottom plate, plumb up to find the top plate location, and mark the stud locations on both plates.
Avoid moisture issues by placing vapour barriers on foundation walls before framing.
Should You Put Plastic On Basement Walls Before Framing?
It is recommended that basement walls be insulated with plastic before framing. This helps to serve as a vapour barrier, preventing moisture from seeping into the walls and floors, which can lead to mould growth. Properly installing a moisture barrier is an important step in basement insulation.
What Is The Spacing For Framing A Basement?
Framing a basement wall typically involves fastening a bottom plate, using a straight stud and level to find the location for the top plate, and marking the location of the first stud on both plates. Proper framing requires consulting a professional, as it can be challenging for beginners.
Placing a vapour barrier on foundation walls before framing is also advised to prevent moisture and mould issues.
Conclusion
Framing a basement wall may seem challenging, but it can be accomplished with the right steps. Start by fastening the bottom plate and use a straight stud to find the location of the top plate. Plumb up, mark the location of the first stud, and continue framing the wall.
Proper framing is crucial for the overall structure of your basement renovation. If you’re a beginner, remember to consult a professional. By following these guidelines, you can confidently frame a basement wall and create a solid foundation for your project.